Schaerer Coffee Art Plus: A Comprehensive Guide to Manual Operation & Coffee Art
This manual provides detailed instructions for operating your Schaerer Coffee Art Plus‚ ensuring optimal performance and beautiful coffee creations.
It’s designed for users seeking a deep understanding of its features.
The Schaerer Coffee Art Plus represents a pinnacle of Swiss engineering‚ designed for discerning coffee enthusiasts and professional baristas alike. This fully automatic coffee machine isn’t simply about brewing coffee; it’s about crafting an experience. It seamlessly blends cutting-edge technology with intuitive manual controls‚ allowing for both automated convenience and the artistry of personalized coffee preparation.
This guide focuses on maximizing the machine’s potential through manual operation‚ unlocking a level of control often absent in fully automatic systems. We will delve into the specifics of each component‚ from the bean hopper to the brew group‚ and provide step-by-step instructions for achieving consistently exceptional results.
Whether you’re a seasoned barista looking to refine your skills or a passionate home user eager to explore the world of specialty coffee‚ this manual will equip you with the knowledge to master the Schaerer Coffee Art Plus and consistently deliver café-quality beverages.
Understanding the Schaerer Coffee Art Plus Key Features
The Schaerer Coffee Art Plus boasts a suite of features designed for both performance and user experience. Central to its operation is the iMilk system‚ ensuring consistently perfect milk texture for cappuccinos and lattes. The machine’s intelligent pre-infusion technology optimizes extraction‚ unlocking the full flavor potential of your chosen beans.
Beyond automation‚ the Coffee Art Plus excels in manual control. The adjustable brew group allows for fine-tuning extraction parameters‚ while the professional steam wand provides precise control over milk frothing. Its intuitive touchscreen interface simplifies navigation and customization‚ even during manual operation.
Furthermore‚ the machine’s self-cleaning functions minimize maintenance‚ and its robust construction guarantees long-term reliability. Understanding these key features is crucial for leveraging the machine’s capabilities and achieving consistently exceptional coffee‚ tailored precisely to your preferences.
Components & Parts Overview
This section details the essential components of the Schaerer Coffee Art Plus‚ providing a foundational understanding of its internal workings for effective operation and maintenance.
Schaerer Coffee Art Plus Parts Diagram – Essential Identification
Understanding the Schaerer Coffee Art Plus begins with familiarizing yourself with its key components. A detailed parts diagram is crucial for both routine maintenance and troubleshooting potential issues. Key areas to identify include the bean hopper‚ grinder assembly‚ brew group‚ water tank‚ and waste container.
The diagram highlights the location of the manual steam wand‚ essential for milk frothing and latte art. Pay close attention to the various sensors and valves‚ as these control the machine’s automated functions. Proper identification of these parts allows for targeted cleaning and efficient repairs.
Referencing the diagram during maintenance procedures ensures you’re addressing the correct components. Knowing the names and functions of each part empowers you to diagnose problems accurately and communicate effectively with service technicians if needed. This visual guide is an invaluable resource for any Schaerer Coffee Art Plus owner.
Brew Group & Its Functionality

The brew group is the heart of the Schaerer Coffee Art Plus‚ responsible for extracting the perfect espresso. It comprises several key components: the brewing chamber‚ the piston‚ and the dispersion screen. Hot water is forced through finely-ground coffee under high pressure within this unit.
Understanding its functionality is vital for consistent coffee quality. The piston drives the water through the coffee puck‚ while the dispersion screen ensures even saturation. Regular cleaning of the brew group is essential to prevent clogging and maintain optimal performance.
Proper operation involves ensuring the coffee is tamped correctly and the brew group is securely locked into place. Monitoring the extraction time and observing the espresso flow provides insights into the grind size and tamping pressure. A well-maintained brew group guarantees rich‚ flavorful espresso with every brew.
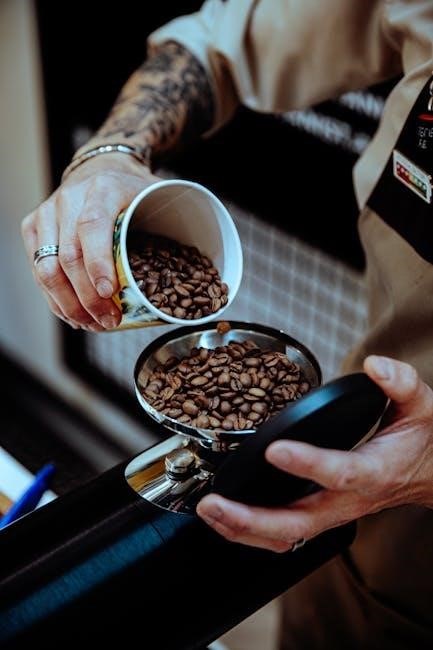
Bean Hopper & Grinder System
The Schaerer Coffee Art Plus features an integrated bean hopper and grinder system‚ crucial for delivering freshly ground coffee for each brew. The bean hopper securely stores whole coffee beans‚ protecting them from moisture and light to preserve their aroma and flavor. Its capacity is designed for moderate to high-volume use.
The grinder‚ typically a conical burr grinder‚ ensures consistent particle size‚ vital for optimal extraction. Adjusting the grind size is key to fine-tuning the espresso’s taste and body. Coarser grinds result in faster extraction and a weaker flavor‚ while finer grinds lead to slower extraction and a bolder taste.
Regular cleaning of the grinder is essential to remove coffee oils and residue‚ preventing clogging and maintaining consistent performance. Monitoring bean levels and grinder settings ensures consistently delicious coffee.
Water System & Filtration
The Schaerer Coffee Art Plus relies on a sophisticated water system to deliver consistently high-quality coffee. This system includes a water reservoir or direct water line connection‚ a pump‚ and a heating element. Water quality is paramount; therefore‚ the machine incorporates a multi-stage filtration system.
The filtration process removes impurities like chlorine‚ calcium‚ and other minerals that can negatively impact the coffee’s taste and the machine’s longevity. Regular filter replacement‚ as per the manufacturer’s recommendations‚ is crucial for maintaining optimal water quality. Using filtered water prevents scale buildup within the machine’s internal components.
Monitoring water levels and ensuring proper filtration are essential for consistent brewing. Descaling the machine periodically‚ using a dedicated descaling solution‚ further protects the water system and ensures peak performance.
Manual Operation: Step-by-Step Guide
This section details the precise steps for manually operating your Schaerer Coffee Art Plus‚ from initial startup to brewing and milk texturing for perfect results.

Powering On & Initializing the Machine
Before your first brew‚ proper initialization is crucial. Begin by connecting the Schaerer Coffee Art Plus to a grounded power outlet‚ ensuring the voltage matches the machine’s requirements. Press the main power button‚ typically located on the front panel.
The machine will initiate a self-test sequence‚ indicated by illuminated lights and potentially audible sounds. Allow this process to complete uninterrupted – it verifies the functionality of key components.
Next‚ the display will prompt you to confirm the water supply connection. Ensure the water tank is filled with fresh‚ filtered water‚ or that the machine is connected to a water line.
The machine may then request a cleaning cycle. This is a standard procedure to flush the system and prepare it for optimal brewing. Follow the on-screen instructions carefully. Once the initialization is complete‚ the machine will enter standby mode‚ ready for manual operation.
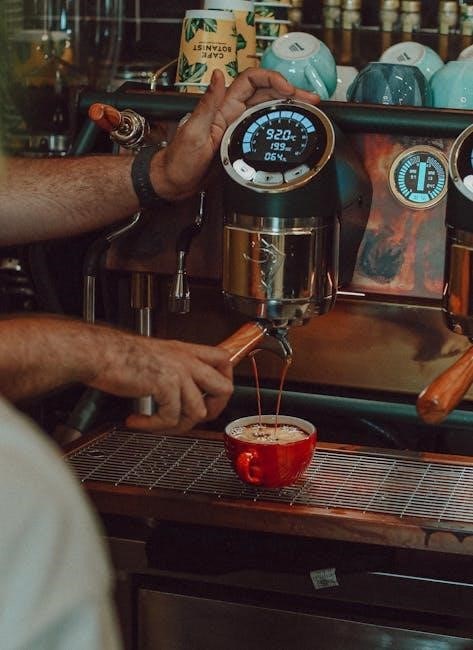
Manual Brewing Process – Single & Double Shots
To initiate a manual brew‚ navigate to the brewing menu on the Schaerer Coffee Art Plus display. Select your desired shot volume – single or double. The machine will then prompt you to confirm the selection.
Ensure the portafilter is securely locked into the brew group. Press the manual brew button‚ and the machine will begin pre-infusion‚ wetting the coffee grounds. Monitor the extraction process closely.
For a single shot (approximately 30ml)‚ aim for an extraction time of 25-30 seconds. A double shot (approximately 60ml) should take around 28-35 seconds. Adjust the grind size if the extraction time deviates significantly from these ranges.
Observe the color and consistency of the espresso. A properly extracted shot will exhibit a rich‚ reddish-brown crema. Stop the brewing process manually when the desired volume is reached‚ or the espresso begins to blonde.
Adjusting Grind Size for Optimal Extraction
Achieving optimal extraction hinges on precise grind size adjustment. The Schaerer Coffee Art Plus allows for micro-adjustments to the grinder settings. Finer grinds increase resistance‚ slowing down extraction and resulting in a stronger‚ more concentrated flavor.
Conversely‚ coarser grinds reduce resistance‚ speeding up extraction and producing a lighter-bodied espresso. Begin with a medium grind setting as a baseline. If the espresso extracts too quickly (under 25 seconds)‚ switch to a finer setting.
If the extraction is too slow (over 35 seconds)‚ opt for a coarser grind. Make small adjustments – one or two notches at a time – and evaluate the results after each change. Consistency is key; record your settings for repeatable results.
Remember that bean age and humidity can also influence grind size requirements. Regularly calibrate your grinder to maintain optimal performance and flavor.
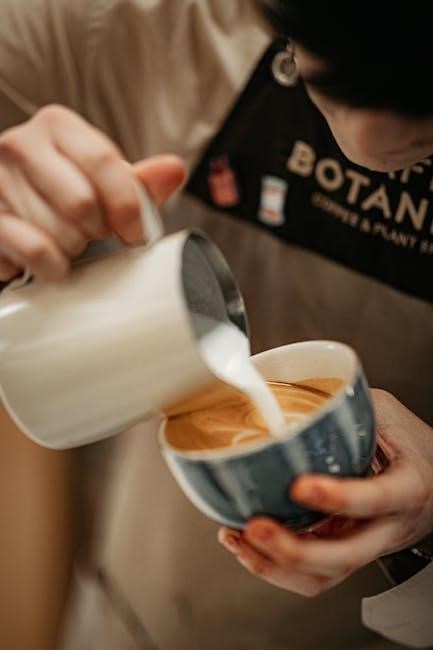
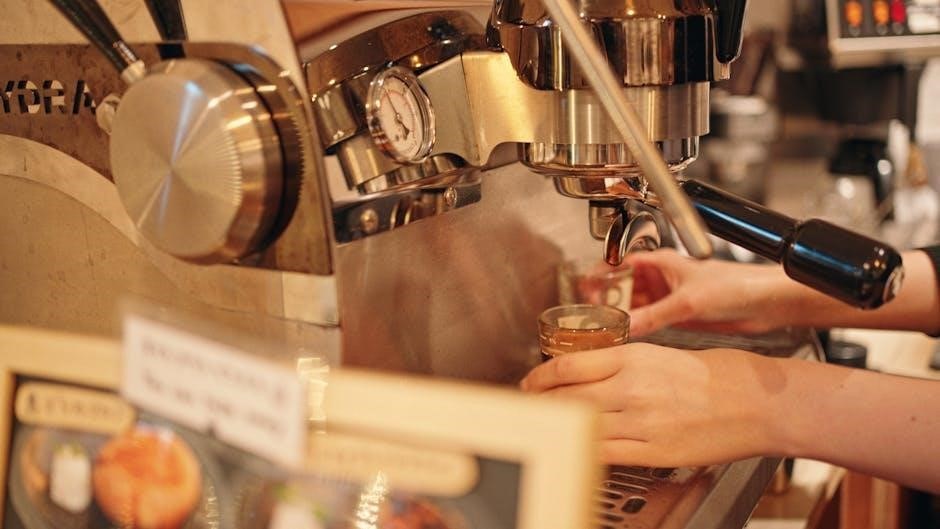
Milk Frothing & Texturing – Manual Wand Control
Mastering milk texturing with the Schaerer Coffee Art Plus’s manual wand requires practice. Begin with a cold stainless steel pitcher‚ filled approximately one-third full with cold milk. Purge the wand to remove any condensation.
Submerge the wand tip just below the surface of the milk and introduce air‚ creating a vortex. Listen for a gentle “kissing” sound. Gradually lower the pitcher to incorporate more air‚ building microfoam – the velvety texture essential for latte art.
Once the milk volume increases by about 50%‚ submerge the wand deeper to create a whirlpool‚ breaking up larger bubbles and integrating the foam. Maintain a consistent temperature‚ avoiding overheating (above 150°F/65°C).
Tap the pitcher firmly on the counter to release any remaining large bubbles‚ then swirl to create a homogenous‚ glossy texture. Practice makes perfect!
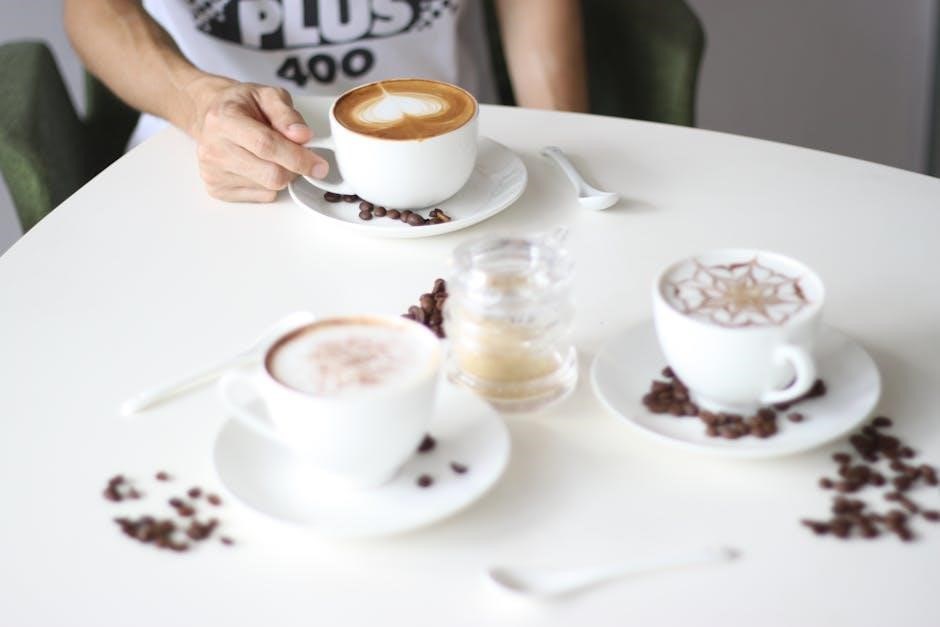
Coffee Art Techniques with the Schaerer Coffee Art Plus
Unlock your inner barista! This section details latte art fundamentals‚ guiding you through creating stunning designs like rosettas‚ tulips‚ and even elegant swans.
Latte Art Basics – Pouring Techniques
Mastering the pour is fundamental to creating beautiful latte art with your Schaerer Coffee Art Plus. Begin with a well-prepared espresso‚ exhibiting a rich crema – this provides the canvas for your art. Next‚ properly textured milk is crucial; aim for a velvety microfoam‚ free of large bubbles.
The initial pour establishes the base. Hold the milk pitcher relatively high and pour a steady stream into the center of the espresso‚ blending the milk and coffee. As the cup fills‚ gradually lower the pitcher‚ continuing the consistent flow.
To begin creating designs‚ reduce the flow rate and bring the pitcher closer to the surface. This allows the milk to sit on top of the crema‚ forming the patterns. Wiggling the pitcher subtly during the pour introduces movement and shapes. Practice controlling the speed and position of the pour to achieve desired effects. Remember‚ consistency and a steady hand are key!
Rosetta Pattern Creation
The Rosetta‚ a classic latte art design‚ resembles a fern and requires a controlled pouring technique with your Schaerer Coffee Art Plus. Begin with the base pour‚ blending milk and espresso as previously described. Once the cup is approximately half full‚ lower the pitcher significantly and initiate the pattern creation.
Gently wiggle the pitcher from side to side while pouring a consistent stream. This creates the leaf-like shapes. The speed of the wiggle and the flow rate determine the size and density of the rosettes. Start with a slow‚ deliberate wiggle and gradually increase the speed as you move across the cup.
To finish‚ lift the pitcher slightly and draw a thin line through the center of the pattern‚ creating the stem. Practice maintaining a consistent flow and wiggle to achieve symmetrical and defined rosettes. Experiment with different wiggle speeds and angles to personalize your designs.
Tulip Pattern Creation
Creating a tulip pattern with the Schaerer Coffee Art Plus involves layering milk to form petal-like shapes. Begin with a base pour‚ integrating the milk and espresso for a uniform color. Then‚ lower the pitcher close to the surface and pour a small‚ circular dot of milk – this forms the first “petal.”
Without lifting the pitcher‚ continue pouring subsequent dots‚ slightly overlapping the previous one. Each dot should be a little smaller than the last‚ creating a layered effect. Maintain a consistent flow rate and avoid rushing the process. The key is controlled layering.
Finally‚ lift the pitcher and draw a thin line through the center of the layered dots‚ creating the stem of the tulip. Practice controlling the milk flow and dot placement to achieve well-defined‚ symmetrical petals. Experiment with the number of layers to vary the tulip’s fullness.
Swan Pattern Creation – Advanced Techniques
The swan pattern is a challenging yet rewarding latte art design. Begin by establishing a solid base pour‚ similar to the tulip‚ creating a circular canvas. Next‚ pour a larger‚ elongated dot towards the far side of the cup – this will form the swan’s body.
Immediately following‚ create a smaller‚ curved dot extending from the body‚ forming the swan’s neck. The angle and length of this dot are crucial for the swan’s graceful posture. Simultaneously‚ gently wiggle the pitcher as you pour to create a feathered texture along the neck.
Finally‚ lift the pitcher and draw a thin line from the neck to create the head and beak. Practice controlling the milk flow and pitcher movement for a smooth‚ elegant swan. Mastering this requires consistent practice and a steady hand;

Maintenance & Troubleshooting
Regular upkeep is vital for peak performance. This section details daily cleaning‚ descaling procedures‚ common error code solutions‚ and a comprehensive maintenance schedule for your machine.
Daily Cleaning Procedures
Consistent daily cleaning is paramount to maintaining the Schaerer Coffee Art Plus’s hygiene and ensuring consistently high-quality beverages. Begin by emptying the drip tray and grounds container after each day’s use. Rinse these components thoroughly with warm water and a mild detergent‚ ensuring all coffee residue is removed.
Next‚ wipe down the exterior surfaces of the machine with a damp‚ soft cloth. Pay particular attention to the steam wand‚ wiping it immediately after each use to prevent milk buildup. For the brew group‚ perform a backflush with a cleaning tablet according to the machine’s instructions – this removes coffee oils and prevents clogging.
The milk system requires diligent attention. Disassemble and clean all milk lines and frothing components‚ soaking them in a dedicated milk cleaner. Finally‚ wipe down the bean hopper area to prevent stale coffee grounds from affecting future brews. Following these steps daily will significantly extend the lifespan of your Schaerer Coffee Art Plus.
Descaling the Schaerer Coffee Art Plus
Regular descaling is crucial for removing mineral buildup within the Schaerer Coffee Art Plus‚ protecting its internal components and maintaining optimal brewing performance. The frequency of descaling depends on your water hardness; typically‚ every 1-3 months is recommended.
Begin by preparing a descaling solution according to the manufacturer’s instructions‚ using a commercially available descaling agent specifically designed for coffee machines. Initiate the descaling program through the machine’s menu‚ following the on-screen prompts carefully. The machine will automatically run the solution through its water system.
After the descaling cycle completes‚ thoroughly rinse the system by running several tanks of fresh water through the machine to eliminate any residual descaling solution. Failure to rinse adequately can affect the taste of your coffee. Monitor the machine’s performance post-descaling to ensure proper functionality and enjoy consistently delicious results.
Troubleshooting Common Issues – Error Codes & Solutions
Encountering issues with your Schaerer Coffee Art Plus? This section addresses common problems and their solutions. Error codes displayed on the machine’s screen indicate specific malfunctions. For example‚ “E1” might signal a low water level‚ requiring a refill. “E2” could indicate a brewing unit error‚ potentially needing a reset or professional service.
If the machine isn’t brewing‚ check the power connection‚ water supply‚ and bean hopper. For milk frothing problems‚ ensure the steam wand is clear and the milk is the correct temperature. Consistent error messages despite troubleshooting suggest a more serious issue.
Consult the complete error code list in the machine’s manual or on the Schaerer website for detailed explanations and recommended actions. If you’re unable to resolve the problem‚ contact a qualified technician for assistance. Attempting self-repair without proper knowledge can void your warranty.
Regular Maintenance Schedule
Maintaining your Schaerer Coffee Art Plus is crucial for longevity and optimal performance. A daily routine should include cleaning the brew group‚ drip tray‚ and milk frothing wand after each use. Weekly tasks involve wiping down the machine’s exterior and cleaning the bean hopper.
Monthly‚ a thorough cleaning of the water tank and filter is recommended. Descaling should be performed every 1-3 months‚ depending on water hardness – use a descaling solution specifically designed for coffee machines. Regularly inspect hoses and connections for leaks or damage.
Every six months‚ consider a professional service for a comprehensive check-up and cleaning of internal components. Adhering to this schedule prevents build-up‚ ensures consistent coffee quality‚ and minimizes potential repairs‚ extending the life of your machine.