Oster Toaster Oven Instruction Manual: A Comprehensive Guide
Welcome! This manual provides essential guidance for operating your Oster French Door Toaster Oven, including safety precautions and recall details from September 2025․
Congratulations on selecting an Oster Toaster Oven! This appliance is designed for versatile cooking, offering functions beyond simple toasting – baking, broiling, and keeping food warm are all within reach; Oster boasts a strong reputation in kitchen appliances, and their toaster ovens are particularly well-regarded;
This manual serves as a comprehensive guide to ensure safe and optimal performance․ It details everything from initial setup and cleaning to troubleshooting common issues․ Please read it thoroughly before first use․ Remember the September 2025 recall affecting models TSSTTVFDXL, TSSTTVFDDG, TSSTTVFDMAF, and TSSTTVFDDAF; verify your model number․
Enjoy access to over 100 million songs via the YouTube Music app, but focus now on mastering your new Oster oven! Explore recipes and unlock its full potential for delicious meals․
Understanding the Control Panel
The Oster Toaster Oven’s control panel is intuitively designed for ease of use․ Familiarize yourself with the function selector dial – this allows you to choose between toasting, baking, broiling, and keep warm settings․ Separate dials control the desired cooking time and temperature, offering precise adjustments for various recipes․
Pay close attention to indicator lights; they signal when the oven is preheating, actively cooking, or has completed its cycle․ While exploring features, remember the September 2025 recall for specific models (TSSTTVFDXL, TSSTTVFDDG, TSSTTVFDMAF, TSSTTVFDDAF)․
Don’t forget resources like YouTube for visual guides! Mastering the control panel unlocks the full potential of your Oster oven, allowing you to create countless culinary delights․
Key Features and Benefits
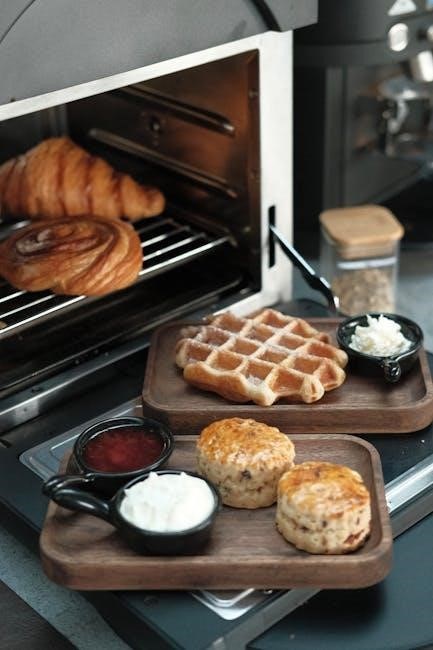
Your Oster Toaster Oven boasts several features designed for convenience and versatility․ The French Door design provides easy access to your food, while the spacious interior accommodates various dish sizes․ Enjoy consistent cooking with precise temperature control and multiple functions – toast, bake, broil, and keep warm – catering to diverse culinary needs․
Beyond functionality, Oster’s reputation as a trusted brand ensures durability․ Remember the September 2025 recall affecting models TSSTTVFDXL, TSSTTVFDDG, TSSTTVFDMAF, and TSSTTVFDDAF; check your model number․
Explore online resources like YouTube for recipe ideas and usage tips․ This oven simplifies meal preparation, offering a convenient alternative to a full-sized oven!
Setting Up Your Oster Toaster Oven
Preparation is key! Ensure proper placement with adequate ventilation, and thoroughly clean the oven before its initial use for optimal performance․
Initial Setup and Cleaning
Unboxing and Preparation: Carefully remove your new Oster Toaster Oven from its packaging, ensuring all packing materials are removed from both inside and outside the oven․ Before the first use, it’s crucial to thoroughly clean the interior․ Wash the crumb tray, baking pan, and broiling rack with warm, soapy water․ Rinse completely and dry before reinserting them into the oven․
Burn-Off Procedure: To eliminate any manufacturing residue, perform a burn-off cycle․ Set the oven to Bake at 400°F (200°C) for approximately 20-30 minutes․ This may produce a slight odor, which is normal․ Ensure good ventilation during this process by opening a window or turning on a kitchen exhaust fan․ Allow the oven to cool completely before using it for cooking․ This initial cleaning ensures a safe and pleasant cooking experience․
Placement and Ventilation Requirements
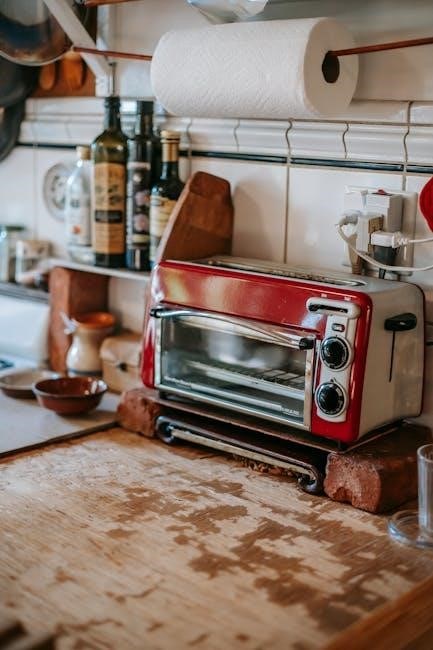
Optimal Positioning: Place your Oster Toaster Oven on a stable, heat-resistant surface, away from flammable materials like curtains or paper towels․ Ensure sufficient space around the oven for proper ventilation – at least 6 inches (15cm) on all sides and 8 inches (20cm) above․ Avoid placing the oven directly under cabinets, as heat and steam could cause damage․
Ventilation is Key: Proper ventilation is crucial for safe and efficient operation․ The oven vents hot air during use; obstructing these vents can lead to overheating and potential fire hazards; Never operate the oven on a carpeted surface or cover it during operation․ Always maintain clear airflow to prevent damage and ensure optimal performance․
Operating Instructions
Get Started: Explore toasting, baking, and broiling functions with your Oster Toaster Oven, alongside the convenient keep-warm feature for delicious results!
Toasting Function: A Step-by-Step Guide
Achieving Perfect Toast: Begin by inserting your bread slices into the toaster oven․ Select your desired toast shade using the control panel – options typically range from light to dark․ Ensure the function dial is set specifically to ‘Toast’․
Next, set the timer according to your preference; start with a shorter time and adjust as needed for subsequent batches․ Press the ‘Start’ button to initiate the toasting cycle․ Monitor the process, and if uneven toasting occurs, consider rotating the bread midway through․
Once the timer concludes, carefully remove the toasted bread․ Always use oven mitts or tongs to prevent burns․ Remember to unplug the oven after each use and allow it to cool completely before cleaning․ Enjoy your perfectly toasted bread!
Baking Function: Recipes and Tips
Unlock Culinary Creativity: Your Oster toaster oven excels at baking smaller portions! For cookies, preheat to 350°F (175°C) and bake for 8-12 minutes, checking frequently․ For quick breads or muffins, use a similar temperature and adjust baking time based on the recipe․
Utilize oven-safe bakeware that fits comfortably within the oven’s interior․ Consider using parchment paper to prevent sticking and simplify cleanup․ Remember that baking times may differ from conventional ovens, so monitor closely․
Experiment with simple recipes like mini pizzas or baked apples․ Always ensure food reaches a safe internal temperature․ Enjoy the convenience of baking delicious treats in a compact space!
Broiling Function: Safety and Usage

High-Heat Cooking with Caution: The broil function delivers intense, direct heat – perfect for browning and crisping․ Always position the oven rack 6-8 inches from the heating element to prevent burning; Use only oven-safe broiling pans with low sides for proper ventilation and grease drainage․
Safety First! Never leave the oven unattended while broiling․ Monitor food closely, as broiling happens rapidly․ Avoid using glass or ceramic cookware, as they may shatter under high heat․ Ensure adequate ventilation in your kitchen during broiling․
For best results, pat food dry before broiling to promote browning․ Remember to turn food halfway through the broiling process for even cooking․
Keep Warm Function: Maintaining Food Temperature
Perfect for Busy Schedules: The Keep Warm function gently holds cooked food at a safe serving temperature without further cooking․ This is ideal when preparing meals in advance or waiting for guests․ Simply select the Keep Warm setting after baking or roasting is complete․
Optimal Warmth, Not Cooking: Understand that Keep Warm doesn’t reheat; it maintains temperature․ Foods should already be fully cooked before utilizing this feature․ Avoid keeping food warm for extended periods – generally, no more than two hours is recommended for food safety․
Ensure food is covered loosely to prevent drying out while warming․ This function provides convenient temperature control, ensuring your dishes are ready when you are!

Safety Precautions
Prioritize Safety: Always follow general guidelines, avoid electrical hazards, and use proper techniques to prevent burns while operating your Oster Toaster Oven safely․
General Safety Guidelines
Read Carefully: Before initial use, thoroughly review this instruction manual to understand all operating procedures and safety precautions associated with your Oster Toaster Oven․ Supervision Required: Close supervision is necessary when the appliance is used by or near children․ Never leave the oven unattended during operation․ Hot Surfaces: The exterior surfaces of the oven become hot during use; utilize oven mitts or handles to avoid burns․
Proper Grounding: Ensure the oven is properly grounded to prevent electrical shock․ Do not operate with a damaged cord or plug․ Avoid Water: Never immerse the oven, cord, or plug in water or other liquids․ Ventilation: Maintain adequate ventilation around the oven during operation․ Do not block air vents․ Unplug When Not In Use: Always unplug the oven from the electrical outlet when not in use and before cleaning․ Repairs: Do not attempt to repair the oven yourself; contact qualified service personnel for assistance․
Avoiding Electrical Hazards
Grounding is Crucial: Your Oster Toaster Oven must be properly grounded to minimize the risk of electrical shock․ Never tamper with or disable the grounding prong․ Cord Inspection: Regularly inspect the power cord for damage․ If the cord is frayed, cracked, or shows any signs of wear, discontinue use immediately․ Outlet Compatibility: Ensure the oven is plugged into a properly grounded outlet with the correct voltage․ Do not use adapters․
Water & Electricity Don’t Mix: Never operate the oven with wet hands or near water sources․ Avoid spilling liquids on the appliance or power cord․ Extension Cords: Avoid using extension cords whenever possible․ If an extension cord is necessary, ensure it is heavy-duty and properly grounded․ Professional Repairs: Electrical components should only be repaired by qualified technicians․ Do not attempt DIY repairs․ Unplug Before Cleaning: Always unplug the oven before cleaning or performing any maintenance․
Proper Usage to Prevent Burns
Hot Surfaces: The exterior surfaces of the Oster Toaster Oven, especially the door, baking pan, and rack, become extremely hot during operation․ Always use oven mitts or pot holders when handling hot components․ Steam Hazard: Be cautious when opening the oven door, as steam can escape and cause burns․ Open the door slowly and direct steam away from your face and body․ Avoid Touching Heating Elements: Never touch the heating elements inside the oven while it is in use or immediately after it has been turned off․
Supervise Children: Keep children away from the oven during operation and allow it to cool completely before handling․ Stable Placement: Ensure the oven is placed on a stable, heat-resistant surface․ Food Handling: Use caution when removing food from the oven, as it will be hot․ Utilize appropriate utensils․ Allow Cooling: Always allow the oven to cool down completely before cleaning or storing․
Maintenance and Cleaning
Regular upkeep ensures optimal performance and longevity of your Oster Toaster Oven; promptly address stubborn stains for continued, efficient operation․
Regular Cleaning Procedures
To maintain your Oster Toaster Oven’s performance and ensure food safety, consistent cleaning is crucial․ Always unplug the oven and allow it to cool completely before beginning․ Remove the crumb tray located at the bottom of the oven and empty it after each use, or more frequently if needed, to prevent buildup and potential fire hazards․
Wipe down the interior with a damp cloth and mild dish soap after each use․ Avoid abrasive cleaners, as they can damage the non-stick coating․ The exterior can be cleaned with a damp cloth and a mild cleaning solution․ For the door, ensure the glass is cool before wiping․ Regularly inspect and clean the heating elements, being careful not to damage them․ A clean oven ensures even cooking and extends the appliance’s lifespan․
Dealing with Stubborn Stains
For baked-on food residue or stubborn stains inside your Oster Toaster Oven, a paste of baking soda and water can be incredibly effective․ Apply the paste to the affected areas, let it sit for 15-20 minutes to loosen the debris, and then gently scrub with a non-abrasive sponge or cloth․ Avoid using steel wool, as it will scratch the interior․
If stains persist, a solution of vinegar and water (equal parts) can help dissolve grease and grime․ Ensure the oven is cool before applying․ For the glass door, a glass cleaner can be used․ Always rinse thoroughly with a damp cloth after using any cleaning solution to remove residue․ Remember to dry all components completely before reassembling and using the oven․
Replacing Parts (if applicable)
While Oster designs its toaster ovens for durability, certain parts may require replacement over time․ Contacting Oster customer support directly is the best first step to determine part availability and compatibility for your specific model (TSSTTVFDXL, TSSTTVFDDG, TSSTTVFDMAF, TSSTTVFDDAF)․
Commonly replaced parts might include the heating elements, glass door, or control panel components․ Do not attempt to repair electrical components yourself; this poses a significant safety risk․ Always disconnect the oven from the power source before attempting any part replacement․ Refer to the official Oster website or support documentation for detailed instructions and diagrams․ Using non-genuine parts may void your warranty and compromise oven performance․

Troubleshooting Common Issues
Encountering problems? This section addresses typical concerns like heating failures, uneven toasting, and deciphering error codes for your Oster toaster oven․
Oven Not Heating
Problem: Your Oster toaster oven isn’t heating up, preventing cooking or toasting․ First, verify the power cord is securely plugged into a functioning outlet․ Test the outlet with another appliance to confirm it’s receiving power․
Check the control panel: Ensure the oven is set to a cooking function (Toast, Bake, Broil) and that a timer has been properly set․ Sometimes, a simple reset is all that’s needed – unplug the oven for several minutes, then plug it back in and retry․
Inspect the heating elements: Carefully (with the oven unplugged!) visually inspect the upper and lower heating elements for any breaks or damage․ If elements appear damaged, do not attempt to repair them yourself; contact Oster customer support or a qualified technician․ Remember the September 2025 recall for specific models (TSSTTVFDXL, TSSTTVFDDG, TSSTTVFDMAF, TSSTTVFDDAF) may be relevant․
Uneven Toasting
Issue: Your toast is darker on one side than the other, or exhibits inconsistent browning․ This often stems from uneven bread placement within the oven․ Ensure bread slices aren’t overlapping or touching the sides of the oven chamber․
Rotate the bread halfway through the toasting cycle for more uniform results․ Also, check the crumb tray; excessive crumbs can contribute to uneven heating․ Regularly cleaning the crumb tray is crucial․
Experiment with the shade settings – lower settings may provide more consistent toasting․ If the problem persists, consider the possibility of a faulty heating element, though this is less common․ Remember to consult the recall information from September 2025 regarding models TSSTTVFDXL, TSSTTVFDDG, TSSTTVFDMAF, and TSSTTVFDDAF, as component issues could be a factor․
Error Codes and Their Meanings
Error codes indicate specific malfunctions within your Oster Toaster Oven; While specific codes vary by model, common errors include “E1” (temperature sensor failure), “E2” (heating element issue), and “E3” (control panel malfunction)․ Consult your specific model’s documentation for a complete list․
If an error code appears, first attempt to power cycle the oven – unplug it for five minutes, then plug it back in․ If the error persists, do not attempt self-repair․ Contact Oster customer support for assistance․
Be aware of the September 2025 recall affecting models TSSTTVFDXL, TSSTTVFDDG, TSSTTVFDMAF, and TSSTTVFDDAF․ Error codes on recalled units may indicate issues related to the spring-loaded bilateral hinge, requiring professional attention or replacement․

Oster Toaster Oven Recall Information (September 2025)
Important safety recall! In September 2025, Oster recalled French Door Toaster Ovens due to a spring-loaded bilateral hinge issue․
Affected Model Numbers (TSSTTVFDXL, TSSTTVFDDG, TSSTTVFDMAF, TSSTTVFDDAF)
Verify your model! This recall specifically impacts Oster French Door Countertop Toaster Ovens with the following model numbers: TSSTTVFDXL, TSSTTVFDDG, TSSTTVFDMAF, and TSSTTVFDDAF․ It is crucial to confirm your appliance’s model number, typically found on a label located on the back or bottom of the oven, to determine if it is subject to this safety recall․
If your toaster oven matches any of these model numbers, immediately discontinue use․ The recall stems from a potential hazard involving the spring-loaded bilateral hinge, posing a risk of injury․ Do not attempt to repair the unit yourself; contact Oster for appropriate remediation options as outlined in the official recall notice․ Your safety is paramount, and prompt action is essential․
Recall Details and Contact Information
Important Recall Notice: In September 2025, Oster initiated a recall of the French Door Countertop Toaster Ovens (models TSSTTVFDXL, TSSTTVFDDG, TSSTTVFDMAF, TSSTTVFDDAF) due to a potential safety issue with the spring-loaded bilateral hinge․ This poses a risk of injury to users․ Consumers should immediately stop using the affected ovens․
To participate in the recall and receive a remedy – either a repair or a replacement – contact Oster customer service directly․ You can reach them for assistance and detailed instructions․ Further information, including frequently asked questions, is available through official Oster channels and the Consumer Product Safety Commission (CPSC) website․ Prioritize your safety and adhere to the recall guidelines․