Aroma 10-Cup Rice Cooker: A Comprehensive Guide
Welcome! This guide details everything you need to know about your new Aroma 10-Cup Rice Cooker, ensuring perfectly cooked grains every time.
The Aroma 10-Cup Rice Cooker is a versatile kitchen appliance designed to simplify your cooking routine. Beyond just white rice, this cooker excels at preparing a variety of grains – brown rice, quinoa, oatmeal, and more – with consistent, fluffy results. It’s an excellent choice for individuals, families, or anyone who enjoys convenient, healthy meals.
This model boasts a generous 10-cup capacity, making it ideal for larger households or meal prepping. Its user-friendly design and multiple cooking functions offer flexibility and ease of use. From steaming vegetables to slow cooking hearty stews, the Aroma 10-Cup Rice Cooker is more than just a rice cooker; it’s a multi-functional cooking companion. This guide will walk you through every step, from initial setup to mastering advanced features.
Unboxing and Component Overview
Carefully unpack your Aroma 10-Cup Rice Cooker and verify all components are present. The box should contain the rice cooker base, the removable inner pot, a steaming basket, a rice measuring cup, and a serving spatula. Some models may also include additional accessories like a condensation collector.
Take a moment to familiarize yourself with each part. The inner pot is where the rice and water will be combined for cooking. The steaming basket fits inside, allowing you to simultaneously steam vegetables or proteins. The measuring cup ensures accurate rice-to-water ratios, crucial for perfect results. The spatula is designed to gently fluff and serve the cooked rice without scratching the non-stick coating. Inspect each item for any damage before proceeding.
What’s Included in the Box
Let’s detail exactly what you should find inside your Aroma 10-Cup Rice Cooker packaging. Primarily, you’ll receive the rice cooker base itself, housing all the electronic components. Crucially, the removable, non-stick inner cooking pot is included – this is where the magic happens! A dedicated steaming basket allows for versatile cooking, enabling simultaneous rice and vegetable preparation.
For accurate measurements, a rice measuring cup is provided, typically marked in standard cup measurements. A serving spatula, often made of plastic or silicone, prevents scratching the inner pot. Many models also include a condensation collector to manage excess moisture during cooking. Finally, you’ll find this comprehensive instruction manual to guide you through every step. Verify all these items are present before proceeding!
Identifying Key Parts (Inner Pot, Steaming Basket, etc.)
Let’s familiarize ourselves with the Aroma 10-Cup Rice Cooker’s components. The inner pot, usually non-stick, is where rice cooks; handle with care! The steaming basket, often plastic, sits inside and allows for steaming vegetables or fish alongside your rice. The heating plate, located at the base, transfers heat to the inner pot.
The control panel features buttons for various functions – we’ll cover those shortly. The lid creates a sealed environment for even cooking and often includes a vent. The condensation collector catches excess moisture, preventing messes. Finally, note the power cord connection point. Understanding these parts is crucial for proper operation and maintenance. Refer to the diagram in the manual for visual clarification.
Initial Setup & First-Time Use
Before your first delicious meal, a little setup is required! Place the Aroma 10-Cup Rice Cooker on a stable, level surface, away from water sources. Ensure there’s adequate ventilation around the unit. Remove all packaging materials and inspect for any damage.
Crucially, before cooking, you must clean the inner pot, steaming basket, and lid (see the ‘Cleaning and Maintenance’ section for details). A first-time ‘burn-off’ is recommended: plug in the cooker, add a cup of water to the inner pot, and run a cooking cycle (using the ‘White Rice’ setting). This removes any manufacturing residue. Discard the water after the cycle completes. Now you’re ready to cook!
Cleaning Before First Use
Thorough cleaning is essential before the inaugural use of your Aroma 10-Cup Rice Cooker. Begin by removing the inner pot and steaming basket. Wash both components in warm, soapy water using a non-abrasive sponge. Avoid harsh detergents or scouring pads, as these can damage the non-stick coating of the inner pot.
Next, wipe down the exterior of the cooker with a damp cloth. The lid is often dishwasher safe (check your model’s manual to confirm!), or can be hand-washed with mild soap and water. Ensure all soap residue is completely rinsed away. Dry all parts thoroughly before reassembling. This initial cleaning process eliminates any potential manufacturing odors or residues, guaranteeing a fresh start for your cooking adventures!
Familiarizing Yourself with the Control Panel
The Aroma 10-Cup Rice Cooker’s control panel is designed for intuitive operation. Typically, you’ll find a large ‘Cook/Warm’ button – this initiates the cooking cycle and automatically switches to ‘Keep Warm’ afterward. Separate buttons often exist for specific functions like ‘White Rice’, ‘Brown Rice’, ‘Steam’, and ‘Slow Cook’.
Indicator lights clearly display the cooker’s current status: ‘Cook’ illuminates during the cooking process, while ‘Warm’ indicates the keep-warm function is active. Some models feature a delay timer button, allowing you to schedule cooking in advance. Take a moment to identify each button and its corresponding function. Refer to your user manual for a detailed diagram and explanation of all control panel features. Understanding these controls is key to unlocking the cooker’s full potential!
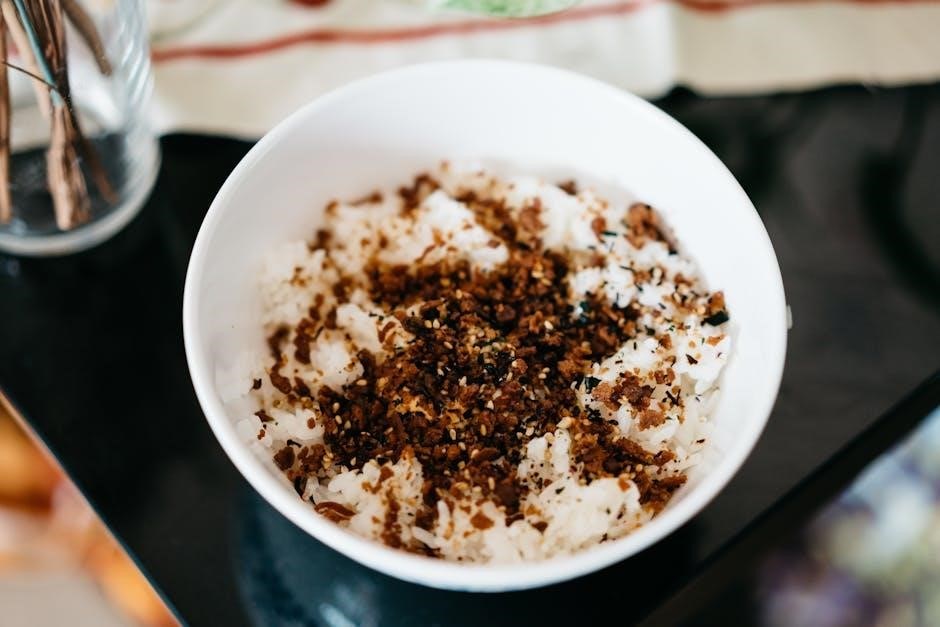
Cooking Perfect Rice: Basic Instructions
Achieving fluffy, delicious rice with your Aroma 10-Cup Cooker is simple! Begin by measuring your desired amount of rice. Rinse the rice under cold water until the water runs clear – this removes excess starch. Add the rinsed rice to the inner pot, then add the appropriate amount of water, following the rice-to-water ratio guide (see section below).
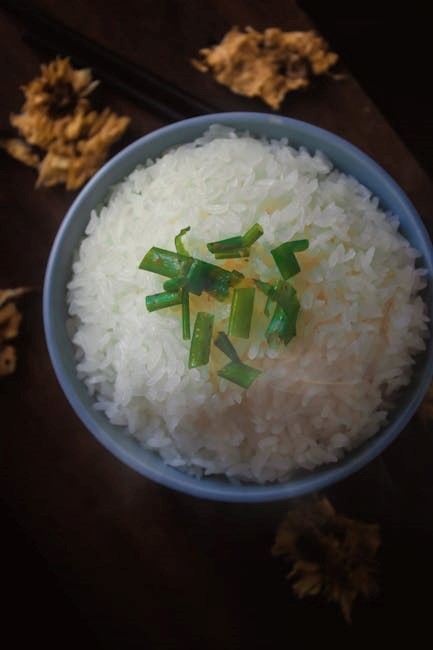
Secure the lid, ensuring a proper seal. Press the ‘White Rice’ button to initiate the cooking cycle. The cooker will automatically switch to ‘Keep Warm’ once cooking is complete. Allow the rice to rest, covered, for 10-15 minutes before fluffing with a fork. This allows steam to redistribute, resulting in perfectly cooked grains. Enjoy!
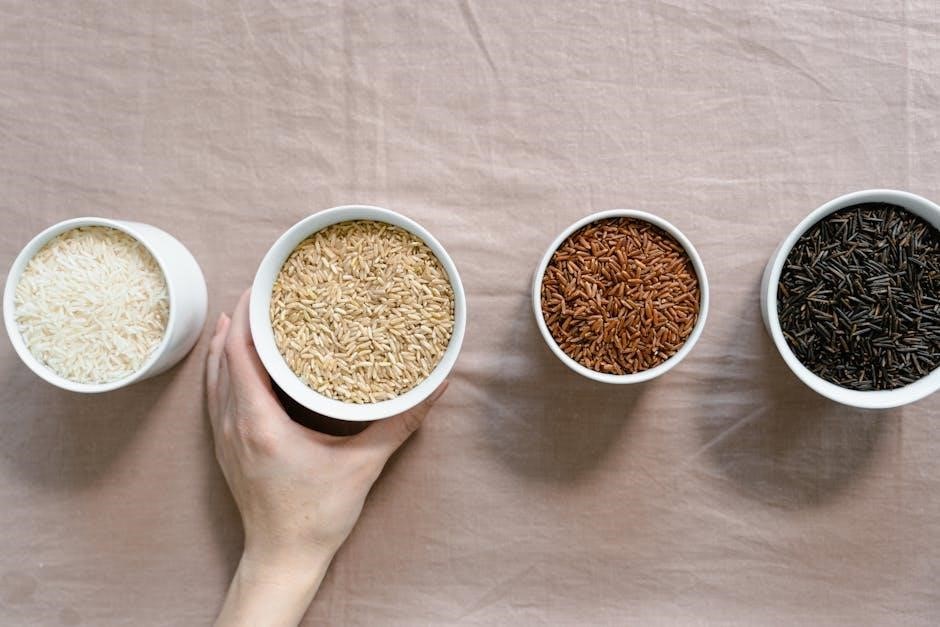
Rice-to-Water Ratio Guide (White, Brown, Jasmine)
Precise ratios are key to perfect rice! For White Rice, use a 1:1 ratio – 1 cup of rice to 1 cup of water. Brown Rice requires more water; a 1:2 ratio (1 cup rice to 2 cups water) is recommended. Adjust slightly based on desired texture.
Jasmine Rice, known for its fragrant aroma, benefits from a slightly less water – try a 1:1.25 ratio (1 cup rice to 1.25 cups water). These are starting points; humidity and rice age can influence results. Experiment to find your preference! Always use the measuring cup provided with your Aroma cooker for consistent results. Remember to rinse your rice before cooking!
Step-by-Step Cooking Process for White Rice
Let’s cook some rice! First, rinse 1 cup of white rice under cold water until the water runs clear. Add the rinsed rice to the inner pot. Then, add 1 cup of water (using the provided measuring cup). Ensure the rice is evenly distributed.
Close the lid securely, ensuring proper alignment. Press the “Cook” button. The cooker will automatically switch to “Warm” once the rice is cooked – approximately 20-30 minutes. Let the rice rest, covered, for 10 minutes before fluffing with a fork. This allows steam to redistribute, resulting in perfectly cooked, fluffy white rice. Enjoy!
Utilizing Different Cooking Functions
Beyond basic rice, your Aroma cooker offers versatility! The “Brown Rice” setting uses a longer cooking cycle and more water for optimal texture. For quicker cooking, select “Quick Rice” – ideal for smaller portions. The “Steam” function, utilizing the included basket, is perfect for vegetables or fish, cooking them healthily alongside your rice.

Explore the “Slow Cook” function for soups and stews – remember to adjust liquid levels accordingly. Always refer to recipe guidelines for specific timings. The “Porridge” setting creates a creamy breakfast treat. Experiment with these functions to unlock the full potential of your Aroma rice cooker!
Brown Rice Setting: Instructions & Tips
Cooking brown rice requires a different approach than white rice due to its bran layer. Begin by rinsing the brown rice thoroughly under cold water until the water runs clear. A typical rice-to-water ratio is 1:2.5 (1 cup rice to 2.5 cups water), but check your rice package for specific recommendations.
Select the “Brown Rice” setting on your Aroma cooker. Cooking time will be significantly longer, usually around 45-50 minutes; Avoid lifting the lid during cooking, as this releases steam and affects the final result. Once cooked, let the rice stand for 10 minutes with the lid on before fluffing with a fork. For softer brown rice, add a tablespoon of oil during cooking.
Steam Function: Vegetables, Fish & More
The Aroma’s steam function offers a healthy way to cook various foods! Ensure there’s enough water in the inner pot – typically 1 cup – but don’t exceed the maximum water line. Place food in the included steaming basket, ensuring it doesn’t touch the water.
Select the “Steam” function. Cooking times vary: vegetables (5-15 minutes), fish (10-20 minutes), and poultry (20-30 minutes). Check for doneness using a fork or thermometer. For best results, cut vegetables into uniform sizes. The steaming basket is also dishwasher safe for easy cleanup. Experiment with herbs and spices for flavorful steamed dishes!
Advanced Features & Recipes
Beyond basic rice, your Aroma cooker unlocks culinary possibilities! Explore recipes like risotto, oatmeal, and even cakes. The slow cook function is perfect for soups and stews – simply add ingredients and set the timer.
For a simple steel-cut oatmeal, use a 3:1 water-to-oatmeal ratio and select the “White Rice” setting. Once cooked, let it rest for 10 minutes. Discover online resources for Aroma-specific recipes. Don’t be afraid to experiment with flavors – add fruits, nuts, or spices. Remember to always consult reliable sources for cooking times and ingredient adjustments when venturing beyond standard rice cooking.
Slow Cook Function: A Beginner’s Guide
The Aroma 10-Cup Rice Cooker isn’t just for rice! Its slow cook function offers convenient, hands-off meal preparation. Begin by browning meats if the recipe requires, then add all ingredients directly into the inner pot. Ensure liquids cover at least half the ingredients for optimal cooking.
Select “Slow Cook” and choose your desired setting: Low for 6-8 hours, or High for 3-4 hours. Remember, slow cooking times are estimates; always check for doneness. Avoid lifting the lid frequently, as this releases heat and extends cooking time. This function is ideal for chili, stews, and pulled pork – transforming your rice cooker into a versatile kitchen appliance!
Keep Warm Function: Maintaining Rice Temperature
After cooking, the Aroma 10-Cup Rice Cooker automatically switches to the “Keep Warm” function. This intelligently maintains your rice at an ideal serving temperature for hours without overcooking or drying it out. It’s perfect for busy households or when serving guests!
The Keep Warm cycle operates at a low, consistent heat. While incredibly convenient, it’s best not to leave rice on “Keep Warm” for more than 12 hours, as quality may gradually diminish. To deactivate, simply unplug the cooker. Note that condensation may form inside the lid during Keep Warm; this is normal and easily wiped away. Enjoy perfectly warm rice whenever you’re ready!
Cleaning and Maintenance
Regular cleaning ensures your Aroma 10-Cup Rice Cooker performs optimally and lasts for years. Always unplug the cooker and allow it to cool completely before cleaning. The inner pot is dishwasher safe, but hand washing with warm, soapy water is recommended to preserve its non-stick coating. Avoid abrasive cleaners or scouring pads.
The exterior can be wiped down with a damp cloth. The steaming basket and accessories are also dishwasher safe or can be hand washed. Never immerse the cooker base in water. For stubborn food residue, soak the inner pot with warm water and dish soap before cleaning. Proper maintenance guarantees delicious rice for countless meals!

Proper Cleaning Procedures for the Inner Pot
The inner pot is crucial for perfect rice, so careful cleaning is essential. After each use, remove the pot and discard any leftover rice. Hand washing is preferred; use warm, soapy water and a soft sponge. Avoid harsh abrasives like steel wool, which can damage the non-stick coating.
For stuck-on food, soak the pot in warm, soapy water for 15-30 minutes before washing. A gentle scrub should then remove the residue. While dishwasher safe, frequent dishwasher use may shorten the lifespan of the non-stick surface. Thoroughly dry the pot after washing to prevent rust or discoloration. A well-maintained inner pot equals consistently delicious results!

Cleaning the Exterior and Steaming Basket
Maintaining a clean exterior is simple! Always unplug the cooker and allow it to cool completely before cleaning. Wipe down the housing with a damp cloth – avoid immersing the base in water. For stubborn stains, a mild detergent can be used, but ensure all residue is removed.

The steaming basket requires regular cleaning too. After use, remove it and wash with warm, soapy water. Check for any food particles lodged in the perforations and gently clear them. The steaming basket is typically dishwasher safe (top rack recommended), but hand washing preserves its quality. Ensure both the exterior and basket are fully dry before reassembling and storing your Aroma rice cooker.
Troubleshooting Common Issues
Experiencing problems? Don’t worry, many are easily resolved! If your rice is consistently mushy, reduce the water slightly in your next batch. Conversely, hard rice indicates insufficient water – add a tablespoon or two.
If the cooker won’t turn on, first check the power cord connection and ensure the outlet is working. Verify the cooker is properly seated. If the ‘Keep Warm’ function isn’t activating, confirm the cooker has completed the cooking cycle. For persistent issues, consult the full user manual or Aroma’s customer support for further assistance. Avoid disassembling the unit yourself.
Rice is Too Mushy or Too Hard
Achieving perfect texture is key! Mushy rice usually stems from too much water. Reduce the water amount by ¼ cup for your next attempt, and ensure accurate measurement. Conversely, hard or crunchy rice indicates insufficient liquid. Add 1-2 tablespoons of water during the next cooking cycle.
Consider rice type: Different varieties require varying water ratios. Always refer to the Rice-to-Water Ratio Guide within this manual. Also, avoid lifting the lid during cooking, as this releases steam and disrupts the process. Experiment slightly to find the ideal ratio for your preferred rice and cooker.
Cooker Won’t Turn On or Keep Warm
Troubleshooting power issues: First, verify the power cord is securely plugged into both the cooker and a functioning outlet. Test the outlet with another appliance to confirm it’s providing power. If still unresponsive, check the reset button, typically located on the cooker’s base – press it firmly.
Keep Warm function failures: Ensure the cooker has completed the cooking cycle before expecting the Keep Warm function to activate. A faulty thermostat could also be the culprit; if problems persist, contact Aroma customer support. Do not attempt to disassemble or repair the cooker yourself, as this voids the warranty and poses a safety risk.